How to Laser Engrave a Mug
In the field of personalized items, engraved mugs occupy a special place. From thoughtful gifts to corporate promotions, these unique etched mugs are more than just containers for our favorite beverages. They can also serve as objects of personal expression and celebration, and are often proudly displayed on shelves or given as gifts on special occasions. In the world of e-commerce, the demand for personalized mugs is on the rise, making the art of mug engraving not only a creative endeavor but also a promising business opportunity.
Whether you plan to design custom mugs for friends, family, clients, or sell to the wider public, learning how to engrave mugs can open up a wealth of possibilities. However, engraving a mug has its own unique challenges compared to engraving a flat surface. The cylindrical shape of the cup requires precise rotation during the engraving process while maintaining stability to ensure perfect results.
In this comprehensive guide, we'll take you through the entire process of engraving a mug using a laser engraver with a rotary attachment, from initial design to final product. With clear step-by-step instructions, even beginners will find themselves ready to embark on this exciting journey. Whether you're exploring this as a hobby or as a potential business venture, our guide will provide all the insights necessary to help you successfully carve your first mug.
Laser Engraved Mug Capabilities
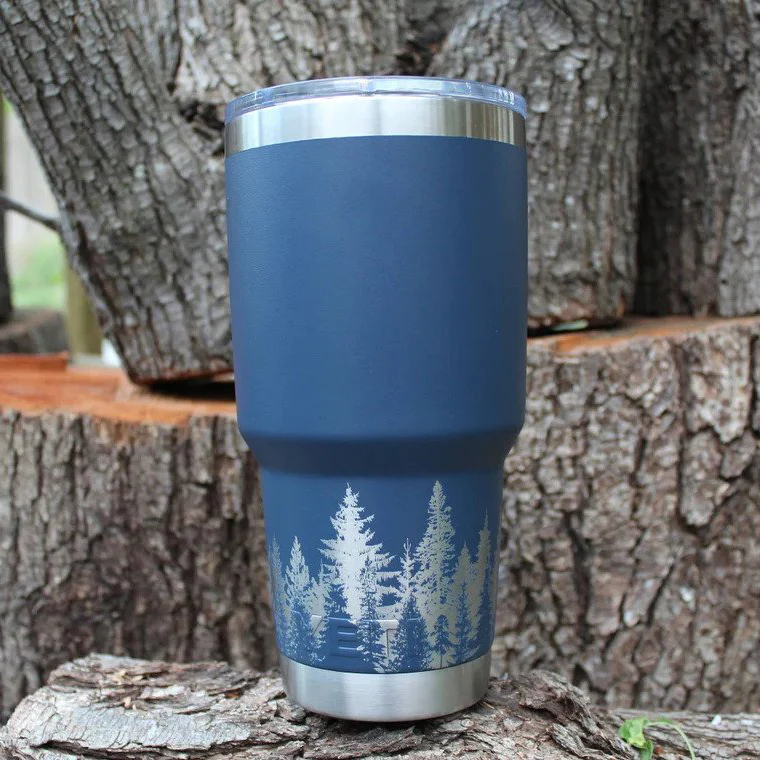
After introducing the concept of laser engraving mugs and the business opportunity it brings, the natural question arises: "Can you really laser engrave mugs?" The short answer is, absolutely. With the right equipment and a little practice, you can precisely engrave designs on the surface of a mug, whether it's a coffee mug or a beer mug, to create a one-of-a-kind, personalized item.
Material Considerations for Laser Engraved Mugs
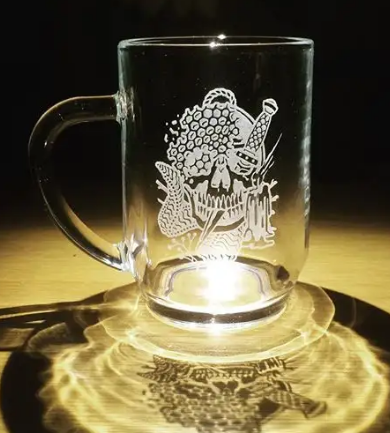
While it is perfectly possible to engrave mugs, it is important to understand that not all mugs are created equal. The success of your engraving project depends largely on the material of the mug. Mugs are usually made of ceramic or glass and are great options for laser engraving. Ceramics are particularly suitable for laser engraving due to their hardness, heat resistance and smooth surface, allowing for extremely fine and precise engravings. Glass, on the other hand, can also be effectively engraved to create fine frosted patterns. However, keep in mind that different materials require different settings on the router, including changes in power and speed.
The Importance of Rotating Attachments
The cylindrical shape of the cup adds additional complexity to the carving process. This is where swivel attachments are essential. The rotating attachment allows the cup to rotate at a controlled speed while the laser is working, ensuring an even, continuous pattern around the cup.
Safety Instructions
Before we dive into the how-to, let's talk about security. Since laser engraving involves high-powered machinery and potentially harmful fumes, it's critical to make safety a top priority. Always wear safety glasses, make sure your work area is well ventilated, and never leave the laser unattended while it is running.
Materials and Tools Required for Laser Engraving Mugs
Before diving into the steps to laser engrave a mug, let's take a look at the tools and materials you'll need for this project. Having these ready before you start will make the process go more smoothly.
Laser engraving machine
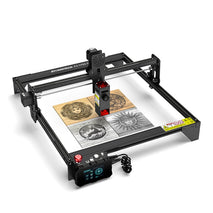
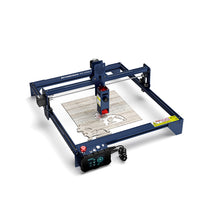
The cornerstone of this project is of course the laser engraver. In this guide, we will focus specifically on using the Atomstack A5 Pro. This is a laser engraving and cutting machine for beginners. Beginners can easily use it and the freeware LaserGRBL.
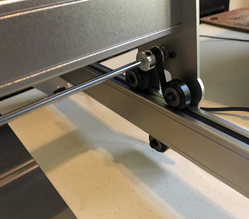
Rotating attachment
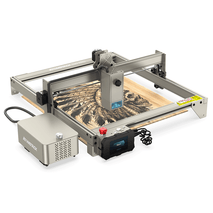
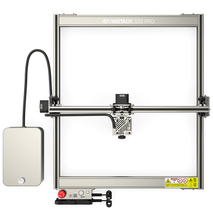
As mentioned earlier, the rotary attachment is critical when laser engraving cylindrical objects such as mugs. The tool enables the cup to rotate at a controlled speed, ensuring an even, continuous design. Here we will be using the Atomstack R1 Pro Rotary Chuck in our project. There are roller rotary type, chuck rotary type, ring rotary type, ball rotary type, etc. Therefore, this single rotary attachment can work in 90% of rotary laser engraving scenarios.
Ceramic or glass
Choose the mug that suits your style or purpose. While ceramic and glass are the most common options, make sure whatever mug you choose is compatible with your laser engraver.
For ceramic mugs and glasses, a CO2 laser engraver is usually the first choice. The operating wavelength (10,600nm) of these lasers is ideal for engraving or etching non-metallic materials, including ceramics and glass. Please note that results may vary depending on the glaze and color of the ceramic mug. A diode laser engraver is a more economical option for engraving ceramics and glasses. However, due to the reflective nature of the material, when engraving a mug with a diode laser, you will need to coat it with a material such as laser marking paper to help absorb the heat from the laser.
protective gear
Safety is always your top priority when using a laser engraver. Safety glasses must be worn to protect your eyes from laser damage. Gloves are also recommended to protect your hands from potential heat or sharp edges.
Computer and Engraving Software
Finally, you'll need a computer with laser engraving software installed to create and send designs to the laser engraver. The software you use depends on the model of your router. For the Atomstack A5 Pro, LaserGRBL or Lightburn are good choices.
How to laser engrave a mug with LaserGRBL
Step 1: Set Up Your Laser Engraver
First, you need to make sure your LaserGRBL is ready for engraving. Turn it on and connect to your computer. Then connect the R1 Pro to it and place the accessory on the work area.
Step 2: Prepare Your Mug and Design
Measure the size of the cup. Measure its circumference and height. Depending on the type of material, you can coat it with laser marking tape or tempera paint. Then, place the cup on the rotating attachment, adjust the position of the laser module by the red cross, and adjust its focal length. Import an image or graphic into the software and resize it on the mug.
Step 3: Choose Laser Settings for Your Mug Engraving
Choose power and speed according to material. You can view power and speed settings from this material settings table.
Step 4: The Engraving Process
Click Start. You will see a new window on your screen. Turn on the cylinder to work. Now, click on the frame and the laser module will trace the frame of the design. It will give you a complete idea of the position of the laser module and the size of the image. Finally, hit the start button to start sculpting.
Step 5: Post-engraving process
After engraving, you will need to remove the coating to reveal the engraving. You can soak it in water for a while to remove it easily.
Whether you plan to design custom mugs for friends, family, clients, or sell to the wider public, learning how to engrave mugs can open up a wealth of possibilities. However, engraving a mug has its own unique challenges compared to engraving a flat surface. The cylindrical shape of the cup requires precise rotation during the engraving process while maintaining stability to ensure perfect results.
In this comprehensive guide, we'll take you through the entire process of engraving a mug using a laser engraver with a rotary attachment, from initial design to final product. With clear step-by-step instructions, even beginners will find themselves ready to embark on this exciting journey. Whether you're exploring this as a hobby or as a potential business venture, our guide will provide all the insights necessary to help you successfully carve your first mug.
Laser Engraved Mug Capabilities
After introducing the concept of laser engraving mugs and the business opportunity it brings, the natural question arises: "Can you really laser engrave mugs?" The short answer is, absolutely. With the right equipment and a little practice, you can precisely engrave designs on the surface of a mug, whether it's a coffee mug or a beer mug, to create a one-of-a-kind, personalized item.
Material Considerations for Laser Engraved Mugs
While it is perfectly possible to engrave mugs, it is important to understand that not all mugs are created equal. The success of your engraving project depends largely on the material of the mug. Mugs are usually made of ceramic or glass and are great options for laser engraving. Ceramics are particularly suitable for laser engraving due to their hardness, heat resistance and smooth surface, allowing for extremely fine and precise engravings. Glass, on the other hand, can also be effectively engraved to create fine frosted patterns. However, keep in mind that different materials require different settings on the router, including changes in power and speed.
The Importance of Rotating Attachments
The cylindrical shape of the cup adds additional complexity to the carving process. This is where swivel attachments are essential. The rotating attachment allows the cup to rotate at a controlled speed while the laser is working, ensuring an even, continuous pattern around the cup.
Safety Instructions
Before we dive into the how-to, let's talk about security. Since laser engraving involves high-powered machinery and potentially harmful fumes, it's critical to make safety a top priority. Always wear safety glasses, make sure your work area is well ventilated, and never leave the laser unattended while it is running.
Materials and Tools Required for Laser Engraving Mugs
Before diving into the steps to laser engrave a mug, let's take a look at the tools and materials you'll need for this project. Having these ready before you start will make the process go more smoothly.
Laser engraving machine
The cornerstone of this project is of course the laser engraver. In this guide, we will focus specifically on using the Atomstack A5 Pro. This is a laser engraving and cutting machine for beginners. Beginners can easily use it and the freeware LaserGRBL.
Rotating attachment
As mentioned earlier, the rotary attachment is critical when laser engraving cylindrical objects such as mugs. The tool enables the cup to rotate at a controlled speed, ensuring an even, continuous design. Here we will be using the Atomstack R1 Pro Rotary Chuck in our project. There are roller rotary type, chuck rotary type, ring rotary type, ball rotary type, etc. Therefore, this single rotary attachment can work in 90% of rotary laser engraving scenarios.
Ceramic or glass
Choose the mug that suits your style or purpose. While ceramic and glass are the most common options, make sure whatever mug you choose is compatible with your laser engraver.
For ceramic mugs and glasses, a CO2 laser engraver is usually the first choice. The operating wavelength (10,600nm) of these lasers is ideal for engraving or etching non-metallic materials, including ceramics and glass. Please note that results may vary depending on the glaze and color of the ceramic mug. A diode laser engraver is a more economical option for engraving ceramics and glasses. However, due to the reflective nature of the material, when engraving a mug with a diode laser, you will need to coat it with a material such as laser marking paper to help absorb the heat from the laser.
protective gear
Safety is always your top priority when using a laser engraver. Safety glasses must be worn to protect your eyes from laser damage. Gloves are also recommended to protect your hands from potential heat or sharp edges.
Computer and Engraving Software
Finally, you'll need a computer with laser engraving software installed to create and send designs to the laser engraver. The software you use depends on the model of your router. For the Atomstack A5 Pro, LaserGRBL or Lightburn are good choices.
How to laser engrave a mug with LaserGRBL
Step 1: Set Up Your Laser Engraver
First, you need to make sure your LaserGRBL is ready for engraving. Turn it on and connect to your computer. Then connect the R1 Pro to it and place the accessory on the work area.
Step 2: Prepare Your Mug and Design
Measure the size of the cup. Measure its circumference and height. Depending on the type of material, you can coat it with laser marking tape or tempera paint. Then, place the cup on the rotating attachment, adjust the position of the laser module by the red cross, and adjust its focal length. Import an image or graphic into the software and resize it on the mug.
Step 3: Choose Laser Settings for Your Mug Engraving
Choose power and speed according to material. You can view power and speed settings from this material settings table.
Step 4: The Engraving Process
Click Start. You will see a new window on your screen. Turn on the cylinder to work. Now, click on the frame and the laser module will trace the frame of the design. It will give you a complete idea of the position of the laser module and the size of the image. Finally, hit the start button to start sculpting.
Step 5: Post-engraving process
After engraving, you will need to remove the coating to reveal the engraving. You can soak it in water for a while to remove it easily.
Older Post
 Newer Post
How to Laser Engrave Your Custom Cutting Board?

How to Transfer Photos to Glass

