Small-Format Engraving on the Go with LaserPecker 2
This handheld laser engraver can be used outdoors or on site, but the small work area and weak laser will ultimately limit the application.
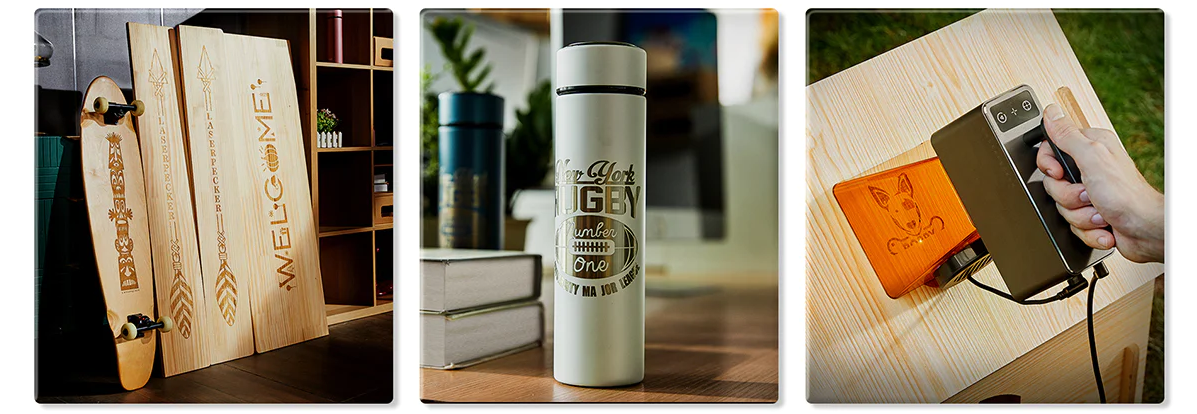
The LaserPecker 2 combines many of the advantages of a larger engraving machine while taking up less space. Its 5W laser and small size offer the all-important portability while still maintaining the possibility of engraving in multiple formats on multiple materials.
But while the LaserPecker 2 can go anywhere, is it the engraver you need for work, travel, or even the great outdoors?
Set up
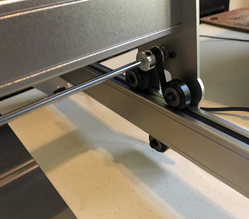
Unlike many laser engravers that require a sturdier, multi-step installation, the LaserPecker 2 snaps together in a snap. The base of the included electric lift stand is connected by two screws and a wrench; the main body of the laser is connected by a simple screw-in nut. From here, users can connect power and adjust the LaserPecker 2's base height.
Before starting any work, the LaserPecker 2 allows a variety of ranging methods to be used. With a light tap or a long press, the button of the motorized lift stand can be used to raise and lower the laser at 1mm intervals. From here, the optimum 110mm distance between the laser and the target surface can be determined via the included ruler, the drop-down distance rod or by using the bottom edge of the attachable protective cover. It doesn't have autofocus; that needs to be done manually.
At this stage, most users will choose to connect to the LaserPecker app via Bluetooth 5.0, but desktop users can also connect to a computer via the included USB cable.
Technical specifications
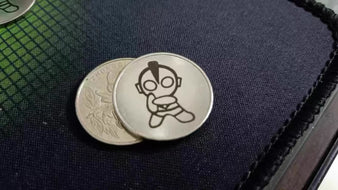
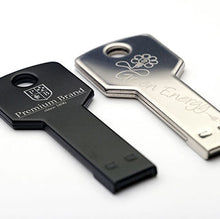
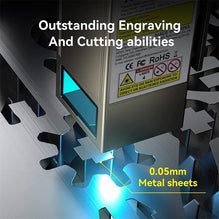
When considering the LaserPecker 2, it's important to note that portability does come with some trade-offs. The 450nm NICHIA diode laser is rated at 5W. For finer details you can choose from 1K, 1.3K or 2K resolution, the LaserPecker 2 uses a smaller laser spot and achieves up to 0.05mm accuracy through its dual optical lenses.
In terms of speed, LaserPecker 2 can achieve a maximum engraving speed of 600 mm/s by using a dual-lens galvanometer. For previews, frame or graphic previews can run at speeds up to 3750mm/s. At the lower end of the estimated engraving speed, engrave at 6 mm/s.
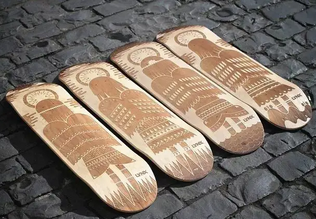
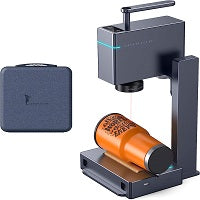
As a smaller sized laser engraver, the LaserPecker 2 can engrave up to 100 x 100 mm on an edge without utilizing the accessory 3rd axis add-on. The additional shaft electric drum and its auxiliary slider can realize a maximum expansion of 100×2000mm.
For those interested in portability, the LaserPecker 2 fits easily in a bag. The basic laser and lift platform weighs only about 2.2 kg (approx. 4.85 lbs) and can be disassembled for safer transport of its components. Overall, these accessories only add a little weight, so you can carry them with you when you need them.
Safety precautions
For new users, LaserPecker 2 tries to instill various safety checks to make it even safer to use. While standard laser safety glasses are included in the base kit, the shield also has a built-in fume extraction fan to provide a basic means of ventilation during its initial operation.
A security code must be entered before starting a preview or job to prevent accidental activation. Warning prompts are repeated during continuous use, reminding the user to install a protective cover, check the work area, and wear glasses. For those concerned about accidentally pressing the top button of the LaserPecker 2, its operation can be disabled via the app.
In addition to these protections, there is tilt and overheat protection to prevent accidents. While you'll still want to take your own precautions to improve air quality and filtration, and prevent accidental fires, the LaserPecker 2 does a better job of preparing the user before they start their next engraving.
Application and Software Use
The LaserPecker 2 tries to simplify use by relying primarily on a smartphone app. Here, users can choose from a sample of the device's camera roll, camera, clip art styles, or create their own text and artwork. That said, the interface is pretty straightforward, so if you want to create your artwork, I recommend doing it elsewhere and importing it from your camera roll.
However, it turns out that using the system's fonts to create text or generate QR and barcodes is much more useful. To better familiarize the user with the different size ratios, the included clip art library provides examples of the default LaserPecker 2 work area and its extended cart size.
But to ensure fewer potential flaws and better translations, it is still recommended to have your files ready in advance. Also, a quick test on scrap is recommended when starting any new design.
Positioning your designs with the LaserPecker app isn't always obvious. In most cases, you'll need to turn the device upside down to preview the correct orientation, or rotate the image in the app. This isn't consistent, so you'll need a sample test to avoid misprints.
Also, I found occasional issues with the Bluetooth connection. Occasionally, the LaserPecker app reports that the Bluetooth connection is unstable and does not function as expected. To get around this issue, you can usually restart the app and device; it occasionally persists. Sometimes you won't run into an error message directly either; your file will hang during transfer over Bluetooth when it's ready to engrave.
In most cases, these problems will be significantly reduced if you update the LaserPecker 2's firmware. However, upgrading does come with some risks, which need to be weighed based on your current file usage.
For those who wish to connect the LaserPecker 2 directly to a computer, this can be done via the included USB cable and a separate computer software interface port on the back of the LaserPecker 2. There may be some connectivity issues when using newer beta versions of the desktop software. However, for those looking for more LightBurn-style software, this is LaserPecker's closest attempt at software to date.
If you choose to downgrade the LaserPecker 2's firmware to an earlier version, you will still be able to use the previous version of the desktop software. Overall, there are fewer incentives to tether the LaserPecker 2 to a computer; it's an option for those who don't want to deal with any mobile apps. In most cases, you're better off with an appropriately sized file for the application, but you're also free to work within the application.
Basic Engraving Method
Using the core suite of LaserPecker 2, users can solve basic engraving problems in a variety of ways. You can take advantage of the top-down mounted motorized lift stand, or you can adjust the separate internal knob next to the distance rod to hold the LaserPecker 2 at the proper distance angle. Alternatively, the LaserPecker 2 can also be detached from the support base.
Whichever you choose, most basic engraving jobs within a 100 x 100 mm area can be done in a few minutes, depending on the size of the design. When you start working, you will choose power and depth. Keep in mind that the more complex the image and the deeper you want to engrave, the longer the overall processing time will be.
The most important consideration you need to consider when deciding whether to engrave with a fixed stand or to hand engrave is your material. If carving anything pre-cut, you will usually want to utilize a handheld carving to ensure proper placement, as the fixed lift support area may be limited. Additionally, those who don't want to create their own DIY ventilation unit can take advantage of the external engraving while being powered from LaserPecker's compact 6,400 mAh rechargeable power bank or other suitable 12V output.
The LaserPecker 2 combines many of the advantages of a larger engraving machine while taking up less space. Its 5W laser and small size offer the all-important portability while still maintaining the possibility of engraving in multiple formats on multiple materials.
But while the LaserPecker 2 can go anywhere, is it the engraver you need for work, travel, or even the great outdoors?
Set up
Unlike many laser engravers that require a sturdier, multi-step installation, the LaserPecker 2 snaps together in a snap. The base of the included electric lift stand is connected by two screws and a wrench; the main body of the laser is connected by a simple screw-in nut. From here, users can connect power and adjust the LaserPecker 2's base height.
Before starting any work, the LaserPecker 2 allows a variety of ranging methods to be used. With a light tap or a long press, the button of the motorized lift stand can be used to raise and lower the laser at 1mm intervals. From here, the optimum 110mm distance between the laser and the target surface can be determined via the included ruler, the drop-down distance rod or by using the bottom edge of the attachable protective cover. It doesn't have autofocus; that needs to be done manually.
At this stage, most users will choose to connect to the LaserPecker app via Bluetooth 5.0, but desktop users can also connect to a computer via the included USB cable.
Technical specifications
When considering the LaserPecker 2, it's important to note that portability does come with some trade-offs. The 450nm NICHIA diode laser is rated at 5W. For finer details you can choose from 1K, 1.3K or 2K resolution, the LaserPecker 2 uses a smaller laser spot and achieves up to 0.05mm accuracy through its dual optical lenses.
In terms of speed, LaserPecker 2 can achieve a maximum engraving speed of 600 mm/s by using a dual-lens galvanometer. For previews, frame or graphic previews can run at speeds up to 3750mm/s. At the lower end of the estimated engraving speed, engrave at 6 mm/s.
As a smaller sized laser engraver, the LaserPecker 2 can engrave up to 100 x 100 mm on an edge without utilizing the accessory 3rd axis add-on. The additional shaft electric drum and its auxiliary slider can realize a maximum expansion of 100×2000mm.
For those interested in portability, the LaserPecker 2 fits easily in a bag. The basic laser and lift platform weighs only about 2.2 kg (approx. 4.85 lbs) and can be disassembled for safer transport of its components. Overall, these accessories only add a little weight, so you can carry them with you when you need them.
Safety precautions
For new users, LaserPecker 2 tries to instill various safety checks to make it even safer to use. While standard laser safety glasses are included in the base kit, the shield also has a built-in fume extraction fan to provide a basic means of ventilation during its initial operation.
A security code must be entered before starting a preview or job to prevent accidental activation. Warning prompts are repeated during continuous use, reminding the user to install a protective cover, check the work area, and wear glasses. For those concerned about accidentally pressing the top button of the LaserPecker 2, its operation can be disabled via the app.
In addition to these protections, there is tilt and overheat protection to prevent accidents. While you'll still want to take your own precautions to improve air quality and filtration, and prevent accidental fires, the LaserPecker 2 does a better job of preparing the user before they start their next engraving.
Application and Software Use
The LaserPecker 2 tries to simplify use by relying primarily on a smartphone app. Here, users can choose from a sample of the device's camera roll, camera, clip art styles, or create their own text and artwork. That said, the interface is pretty straightforward, so if you want to create your artwork, I recommend doing it elsewhere and importing it from your camera roll.
However, it turns out that using the system's fonts to create text or generate QR and barcodes is much more useful. To better familiarize the user with the different size ratios, the included clip art library provides examples of the default LaserPecker 2 work area and its extended cart size.
But to ensure fewer potential flaws and better translations, it is still recommended to have your files ready in advance. Also, a quick test on scrap is recommended when starting any new design.
Positioning your designs with the LaserPecker app isn't always obvious. In most cases, you'll need to turn the device upside down to preview the correct orientation, or rotate the image in the app. This isn't consistent, so you'll need a sample test to avoid misprints.
Also, I found occasional issues with the Bluetooth connection. Occasionally, the LaserPecker app reports that the Bluetooth connection is unstable and does not function as expected. To get around this issue, you can usually restart the app and device; it occasionally persists. Sometimes you won't run into an error message directly either; your file will hang during transfer over Bluetooth when it's ready to engrave.
In most cases, these problems will be significantly reduced if you update the LaserPecker 2's firmware. However, upgrading does come with some risks, which need to be weighed based on your current file usage.
For those who wish to connect the LaserPecker 2 directly to a computer, this can be done via the included USB cable and a separate computer software interface port on the back of the LaserPecker 2. There may be some connectivity issues when using newer beta versions of the desktop software. However, for those looking for more LightBurn-style software, this is LaserPecker's closest attempt at software to date.
If you choose to downgrade the LaserPecker 2's firmware to an earlier version, you will still be able to use the previous version of the desktop software. Overall, there are fewer incentives to tether the LaserPecker 2 to a computer; it's an option for those who don't want to deal with any mobile apps. In most cases, you're better off with an appropriately sized file for the application, but you're also free to work within the application.
Basic Engraving Method
Using the core suite of LaserPecker 2, users can solve basic engraving problems in a variety of ways. You can take advantage of the top-down mounted motorized lift stand, or you can adjust the separate internal knob next to the distance rod to hold the LaserPecker 2 at the proper distance angle. Alternatively, the LaserPecker 2 can also be detached from the support base.
Whichever you choose, most basic engraving jobs within a 100 x 100 mm area can be done in a few minutes, depending on the size of the design. When you start working, you will choose power and depth. Keep in mind that the more complex the image and the deeper you want to engrave, the longer the overall processing time will be.
The most important consideration you need to consider when deciding whether to engrave with a fixed stand or to hand engrave is your material. If carving anything pre-cut, you will usually want to utilize a handheld carving to ensure proper placement, as the fixed lift support area may be limited. Additionally, those who don't want to create their own DIY ventilation unit can take advantage of the external engraving while being powered from LaserPecker's compact 6,400 mAh rechargeable power bank or other suitable 12V output.
Older Post
 Newer Post

The Atomstack A5 PRO+ Review

Versatile and Powerful ORTUR LU3-20A Laser Engraver


