Master the Art of Diode Laser Engraving with These Techniques
Diode laser engraving is a popular and versatile technology used in a variety of industries including jewelry making, woodworking and metalworking. With its precision and ability to engrave on a variety of materials, diode laser engraving has become the method of choice for many professionals and amateurs alike. But mastering the technique takes time, practice, and some key tips and tricks.
In this article, we'll explore the best techniques for mastering the art of diode laser engraving. Whether you're a beginner or an experienced engraver, these tips will help you produce high-quality, professional-looking results every time.
So let's dive in and learn how to "Master the Art of Diode Laser Engraving with These Techniques".
Learn the Basics of Diode Laser Engraving
Before getting started, it is important to understand the basics of diode laser engraving. A diode laser is a type of laser that uses semiconductors to produce laser light. Light is then focused onto the material being engraved, producing precise and intricate designs.
First, you'll need a diode laser engraver, a material to engrave, and a design to work with. You also need to have a good understanding of the properties of the material you are using, including its thickness, density and ability to absorb laser light.
Choose the right material
One of the most important aspects of diode laser engraving is choosing the right material. Not all materials are suitable for laser engraving, and some may be more challenging than others.
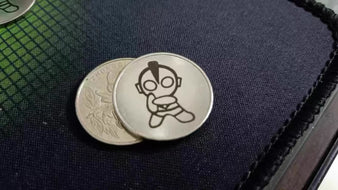
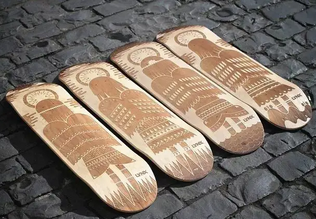
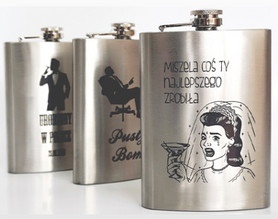
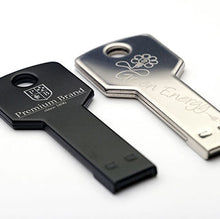
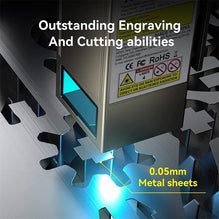
Materials such as wood, opaque acrylic, and paint (as a removal process) are often the materials of choice for diode laser engraving because of their ability to absorb the laser light and produce a clear and precise design. However, materials such as metal and stone may require additional steps, such as coating or etching, to produce good results.
Create your design
Once you've chosen the right material, it's time to start creating your design. There are many software programs available for creating laser engraved designs, including Adobe Illustrator, CorelDRAW, and Inkscape. When creating a design, it is important to consider the size, detail and complexity of the design, as well as the properties of the materials you will be using.
Engraving Techniques and Techniques
Now that you have a basic understanding of diode laser engraving and created your design, it's time to start the engraving process. Here are some of the best techniques and tips for getting professional-quality results:
Adjust power and speed settings
Adjusting the power and speed settings of your diode laser engraver is critical to creating high-quality engravings that meet your specific needs. Here are some tips and tricks for adjusting these settings:
Understanding Power and Speed
Before adjusting power and speed settings, it's important to understand what each setting does. Power, also known as laser intensity, refers to the amount of energy produced by a laser beam. This energy determines the depth and clarity of the engraving. Velocity, on the other hand, refers to the speed at which the laser beam travels through the material. Slower speeds will result in darker engravings, while faster speeds will result in lighter engravings. The best litmus test for visualizing the effects of speed and power settings is to use a test grid. Run a test mesh on any material before committing to a project and you'll easily find the best settings for the job.
Try different settings
To find the ideal power and speed settings for your particular project, try different combinations to see which one produces the best engraving results. Start with lower power and speed settings and gradually increase until the desired result is achieved. Remember that different materials require different power and speed settings, so be sure to adjust accordingly. It's also a good idea to note the power and speed settings used for each material so you can easily replicate results in the future.
Adjust to material
The type of material you are sculpting will also affect the power and speed settings you use. For example, harder materials such as metal will require higher power and slower speed settings, while softer materials such as wood may require lower power and faster speed settings. By taking the time to understand the characteristics of each material and adjusting the power and speed settings accordingly, you can achieve the best results and "master the art of diode laser engraving using these techniques".
Power vs. Speed Tradeoff
When adjusting power and speed settings, it's important to consider the tradeoff between the two. For example, using a higher power setting will result in a deeper engraving, but may also increase the risk of burning material. Conversely, using a higher speed setting will result in a lighter engraving, but may also improve the clarity of the design. Finding the right balance between power and speed takes some experimentation, but the end result is worth it.
By taking the time to adjust the power and speed settings of your diode laser engraver, you can achieve the results you want and create high-quality engravings that meet your specific needs.
Try different materials
Experimenting with different materials is a key part of becoming a master diode laser engraver. Different materials can produce unique results, and testing various options can help you determine the ideal material for your particular project. Some popular materials used in diode laser engraving include wood, acrylic, glass, metal, and stone, each with its own specific characteristics and laser engraving characteristics. For best results, it is essential to know the characteristics of each material, such as its thickness, density, and ability to absorb laser light. This information can be used to adjust the settings of your diode laser engraver for best results.
To experiment with different materials, try using different power and speed settings on various materials to see which combination produces the sharpest and most precise design. You can also experiment with different focal lengths on the laser lens to see which length works best for each material. Also, try varying the engraving depth on different materials to see which gives the desired effect. These techniques will help you determine the best settings for your engraver and material you are using, ultimately allowing you to "master the art of diode laser engraving".
Maintaining Your Diode Laser Engraver
Maintaining your diode laser engraver is critical to ensuring it operates at peak performance and produces consistently high-quality results. Here are some tips and techniques for maintaining your router:
Clean lens
The lens of a diode laser engraver is critical to its performance as it focuses the laser light for engraving. It is very important to keep the lens clean to avoid any dirt or debris affecting the intensity and focus of the laser beam. To clean the lens, first turn off the engraver, then use lens cleaning fluid and a microfiber cloth to gently wipe away any dirt or smudges. If there's residue that the cleaning solution can't remove, try using a lens tissue or lens tissue.
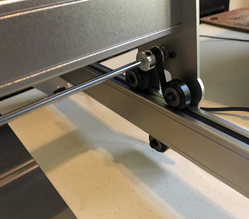
Check Alignment and Calibration
It is important to regularly check the alignment and calibration of your diode laser engraver to ensure it produces accurate results. Check the focusing lens first to make sure it is aligned with the laser beam and adjust if necessary. You can also check the alignment of the laser beam by shining it on the test surface and observing the dot pattern. If the dot pattern is uneven, the laser beam may need to be realigned. Also, it is important to regularly check the calibration of your engraving machine to ensure it produces the correct engraving depth and size.
Replace consumables
Consumables such as mirrors, lenses, and laser diodes will eventually wear out and need to be replaced. It is important to keep track of when these supplies need to be replaced to avoid any disruption to your engraving project. Replacing consumables as soon as they show signs of wear will also help prolong the life of your router.
Store correctly
It is important to store your diode laser engraver in a clean, dry place when not in use to avoid the accumulation of dust or moisture which can affect its performance. Also, it's a good idea to cover the engraver to protect it from scratches or other damage.
By following these maintenance tips and techniques, you can keep your diode laser engraver running smoothly and producing high-quality results, helping you master the art of diode laser engraving.
Mastering the art of laser engraving takes time, practice, and the right technique and technique. By understanding the basics of diode laser engraving, choosing the right material, creating your design, and using the right technique and software, you can produce high-quality, professional-looking results every time.
In this article, we'll explore the best techniques for mastering the art of diode laser engraving. Whether you're a beginner or an experienced engraver, these tips will help you produce high-quality, professional-looking results every time.
So let's dive in and learn how to "Master the Art of Diode Laser Engraving with These Techniques".
Learn the Basics of Diode Laser Engraving
Before getting started, it is important to understand the basics of diode laser engraving. A diode laser is a type of laser that uses semiconductors to produce laser light. Light is then focused onto the material being engraved, producing precise and intricate designs.
First, you'll need a diode laser engraver, a material to engrave, and a design to work with. You also need to have a good understanding of the properties of the material you are using, including its thickness, density and ability to absorb laser light.
Choose the right material
One of the most important aspects of diode laser engraving is choosing the right material. Not all materials are suitable for laser engraving, and some may be more challenging than others.
Materials such as wood, opaque acrylic, and paint (as a removal process) are often the materials of choice for diode laser engraving because of their ability to absorb the laser light and produce a clear and precise design. However, materials such as metal and stone may require additional steps, such as coating or etching, to produce good results.
Create your design
Once you've chosen the right material, it's time to start creating your design. There are many software programs available for creating laser engraved designs, including Adobe Illustrator, CorelDRAW, and Inkscape. When creating a design, it is important to consider the size, detail and complexity of the design, as well as the properties of the materials you will be using.
Engraving Techniques and Techniques
Now that you have a basic understanding of diode laser engraving and created your design, it's time to start the engraving process. Here are some of the best techniques and tips for getting professional-quality results:
Adjust power and speed settings
Adjusting the power and speed settings of your diode laser engraver is critical to creating high-quality engravings that meet your specific needs. Here are some tips and tricks for adjusting these settings:
Understanding Power and Speed
Before adjusting power and speed settings, it's important to understand what each setting does. Power, also known as laser intensity, refers to the amount of energy produced by a laser beam. This energy determines the depth and clarity of the engraving. Velocity, on the other hand, refers to the speed at which the laser beam travels through the material. Slower speeds will result in darker engravings, while faster speeds will result in lighter engravings. The best litmus test for visualizing the effects of speed and power settings is to use a test grid. Run a test mesh on any material before committing to a project and you'll easily find the best settings for the job.
Try different settings
To find the ideal power and speed settings for your particular project, try different combinations to see which one produces the best engraving results. Start with lower power and speed settings and gradually increase until the desired result is achieved. Remember that different materials require different power and speed settings, so be sure to adjust accordingly. It's also a good idea to note the power and speed settings used for each material so you can easily replicate results in the future.
Adjust to material
The type of material you are sculpting will also affect the power and speed settings you use. For example, harder materials such as metal will require higher power and slower speed settings, while softer materials such as wood may require lower power and faster speed settings. By taking the time to understand the characteristics of each material and adjusting the power and speed settings accordingly, you can achieve the best results and "master the art of diode laser engraving using these techniques".
Power vs. Speed Tradeoff
When adjusting power and speed settings, it's important to consider the tradeoff between the two. For example, using a higher power setting will result in a deeper engraving, but may also increase the risk of burning material. Conversely, using a higher speed setting will result in a lighter engraving, but may also improve the clarity of the design. Finding the right balance between power and speed takes some experimentation, but the end result is worth it.
By taking the time to adjust the power and speed settings of your diode laser engraver, you can achieve the results you want and create high-quality engravings that meet your specific needs.
Try different materials
Experimenting with different materials is a key part of becoming a master diode laser engraver. Different materials can produce unique results, and testing various options can help you determine the ideal material for your particular project. Some popular materials used in diode laser engraving include wood, acrylic, glass, metal, and stone, each with its own specific characteristics and laser engraving characteristics. For best results, it is essential to know the characteristics of each material, such as its thickness, density, and ability to absorb laser light. This information can be used to adjust the settings of your diode laser engraver for best results.
To experiment with different materials, try using different power and speed settings on various materials to see which combination produces the sharpest and most precise design. You can also experiment with different focal lengths on the laser lens to see which length works best for each material. Also, try varying the engraving depth on different materials to see which gives the desired effect. These techniques will help you determine the best settings for your engraver and material you are using, ultimately allowing you to "master the art of diode laser engraving".
Maintaining Your Diode Laser Engraver
Maintaining your diode laser engraver is critical to ensuring it operates at peak performance and produces consistently high-quality results. Here are some tips and techniques for maintaining your router:
Clean lens
The lens of a diode laser engraver is critical to its performance as it focuses the laser light for engraving. It is very important to keep the lens clean to avoid any dirt or debris affecting the intensity and focus of the laser beam. To clean the lens, first turn off the engraver, then use lens cleaning fluid and a microfiber cloth to gently wipe away any dirt or smudges. If there's residue that the cleaning solution can't remove, try using a lens tissue or lens tissue.
Check Alignment and Calibration
It is important to regularly check the alignment and calibration of your diode laser engraver to ensure it produces accurate results. Check the focusing lens first to make sure it is aligned with the laser beam and adjust if necessary. You can also check the alignment of the laser beam by shining it on the test surface and observing the dot pattern. If the dot pattern is uneven, the laser beam may need to be realigned. Also, it is important to regularly check the calibration of your engraving machine to ensure it produces the correct engraving depth and size.
Replace consumables
Consumables such as mirrors, lenses, and laser diodes will eventually wear out and need to be replaced. It is important to keep track of when these supplies need to be replaced to avoid any disruption to your engraving project. Replacing consumables as soon as they show signs of wear will also help prolong the life of your router.
Store correctly
It is important to store your diode laser engraver in a clean, dry place when not in use to avoid the accumulation of dust or moisture which can affect its performance. Also, it's a good idea to cover the engraver to protect it from scratches or other damage.
By following these maintenance tips and techniques, you can keep your diode laser engraver running smoothly and producing high-quality results, helping you master the art of diode laser engraving.
Mastering the art of laser engraving takes time, practice, and the right technique and technique. By understanding the basics of diode laser engraving, choosing the right material, creating your design, and using the right technique and software, you can produce high-quality, professional-looking results every time.
Older Post
 Newer Post
Tips and Techniques for Optimizing Laser Engraved Images

Why does my laser need air assist?


