Tips and Techniques for Optimizing Laser Engraved Images
Read our simple guide on how to process images to get the best results for your laser engraving projects. Laser engraving has become a popular way to personalize and customize a wide variety of items, from jewelry to electronics. However, for best results, you need to prepare your images properly. In this article, we'll give you step-by-step instructions on how to process laser engraved images, specifically how to convert images to black and white in Photoshop, Illustrator, and GIMP.
Step 1: Choose the correct image
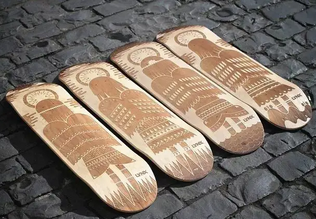
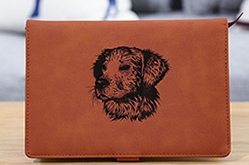
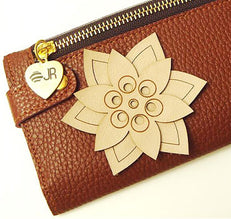
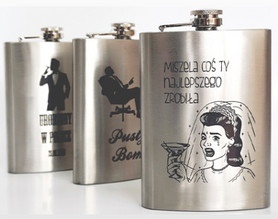
The first step in working with laser engraved images is selecting the correct image. Not all images are suitable for laser engraving, as the laser engraving process occurs by burning or vaporizing the surface of the material. Therefore, images with high contrast, sharp edges, and crisp lines tend to work best. You should avoid images that are too complex or have too much detail, as they may not translate well to the laser engraving process.
Step 2: Convert the image to black and white
With the right image selected, the next step is to convert it to black and white. Laser engravers typically process black and white images, so you need to make sure the images are in the correct format. You can use any image editing software such as Adobe Photoshop or GIMP to convert the image to black and white.
For Adobe Illustrator
If you need a standard grayscale image and want a quick and easy way to do it, follow these steps:
Step 1: Select the images to convert. If you want to convert the entire artwork, use the keyboard shortcut Command + A to select all.
Step 2: Open the Edit menu and click Edit Colors. Then select "Convert to Grayscale" to convert the image to black and white.
Step Three: Done!
For Photoshop
Step 1: Open the image
To open an image, you can go to the "File" menu and select "Open" or use the keyboard shortcut "CTRL+O". When the dialog box appears, navigate to where the image is located, select it, and click Open.
Step 2: Duplicate the layer
Right-click on the original background layer and choose Duplicate Layer. A dialog will appear where you can rename the layer. After that, click OK to create a new layer above the original layer.
Step 3: Convert the image to black and white
There are various ways to convert an image to black and white:
Black and white tool: Go to "Image" > "Adjustment" > "Black and White", click "OK" in the pop-up box.
Hue/Saturation Tool: Go to Image > Adjustments > Hue/Saturation and set Saturation to (-100) or slide the slider all the way to the left. Then, click OK.
Gradient Map Tool: Press 'D' to reset the colors to white and black, then go to Image > Adjustments > Gradient Map and click OK.
Desaturation Tool: Go to Image > Adjustments > Desaturation.
Hue/Saturation adjustment layer: Go to Layer > New Adjustment Layer > Hue/Saturation and click OK. Set Saturation to (-100) or slide the slider all the way to the left. Then, press "CTRL+SHIFT+ALT+E" to create a separate merged layer.
Gradient Map adjustment layer: Press "D" to reset the colors to white and black, then go to Layer > New Adjustment Layer > Gradient Map and click OK. Then, press "CTRL+SHIFT+ALT+E" to create a separate merged layer.
Black and white adjustment layer: Go to Layer > New Adjustment Layer > Black and White, and click OK. Then, press "CTRL+SHIFT+ALT+E" to create a separate merged layer.
Grayscale mode: Go to Image > Mode > Grayscale and click Discard. Note that this method is irreversible and should be used with caution.
Step 4: Invert black and white
To invert a black and white image, go to Image > Adjustments > Invert or use the shortcut key "CTRL+I". The colors of the image will be inverted.
Step 5: Save the Image
To save an image, go to the "File" menu and select "Save As". Rename the image and choose "JPEG" or "PNG" from the "Save as type" option. Click Save to save the image.
For GIMP
Enable grayscale mode:
To convert an image to black and white using grayscale, follow these steps:
Open the image in RGB mode.
Click the "Image" tab in the menu bar, then select "Mode" and click the "Grayscale" radio button.
The image will be instantly converted to black and white.
Once you choose grayscale, all your future input and editing will also be in grayscale. To change this, open Image > Mode and choose RGB to reintroduce color without changing the image that has been converted to grayscale.
Use desaturation:
To convert an image to black and white using desaturation, follow these steps:
To convert an image to black and white using desaturation, follow these steps:
Select the layer you want to turn black and white.
Click the Color option in the menu bar, then choose Saturation.
A popup will appear where you can change the intensity of the black and white shadows using the Scale option.
The tool saves the saturation level as a preset, which means it will use the same settings for other images later.
Besides that, there are other desaturation modes like Luminosity, Brightness, Brightness, Average and Value. Each mode applies a different black and white tone to the image, which can be further adjusted by changing the brightness and color channels.
You can access these modes by opening Color > Desaturation, then selecting Desaturation again.
This will open a popup where you can apply these modes to the image.
Adjust via the channel mixer:
To change the color to black and white using the channel mixer, follow these steps:
Open Color > Components > Monochrome Mixer.
This will turn the image black and white and open a popup to customize the RGB channels.
Now you can use these RGB channels to change the tone of a black and white image.
To maintain the same brightness level, these values should add up to 100%. For example, if you set Red to 31%, Green to 58%, and Blue to 11%, you will get the same black and white tone image as in the Grayscale option.
To prevent brightness issues, enable the "Preserve Brightness" switch. It will adjust RGB layers without affecting brightness levels.
If you're looking for a darker image, lower the blue channel level, which will make certain things stand out.
The advantage of the channel mixer is the flexibility it offers. It allows customization of every part of the image, including red, green and blue levels, for perfect black and white tones. It is especially useful for increasing contrast and highlighting the layout and lines of an image without adding noise.
Step Three: Adjust Contrast and Brightness
After converting the image to black and white, the next step is to adjust the contrast and brightness. You will want to ensure that the light and dark areas of the image have a good balance, as this will help the laser engraver produce more accurate and detailed engravings. You can adjust contrast and brightness using image editing software.
Step 4: Resize the image
After adjusting the contrast and brightness, the next step is to resize the image. You need to make sure the image is suitable for the item you are engraving. You can use image editing software to resize the image to the correct size. Tip: You can also adjust this in LightBurn or whatever software you're using, but it's best to image the edit at your desired output size.
Step 5: Save the image in the correct format
The final step in working with laser engraved images is saving them in the correct format. Laser engravers typically use vector images, such as SVG or AI files. You can use image editing software to save the image in the correct format.
By following the steps below, you can process your laser engraved images and get the best results. Remember to select the correct image, convert it to black and white, adjust contrast and brightness, resize the image, and save it in the correct format. With these tips, you can create personalized and customized items that are unique and beautiful.
Step 1: Choose the correct image
The first step in working with laser engraved images is selecting the correct image. Not all images are suitable for laser engraving, as the laser engraving process occurs by burning or vaporizing the surface of the material. Therefore, images with high contrast, sharp edges, and crisp lines tend to work best. You should avoid images that are too complex or have too much detail, as they may not translate well to the laser engraving process.
Step 2: Convert the image to black and white
With the right image selected, the next step is to convert it to black and white. Laser engravers typically process black and white images, so you need to make sure the images are in the correct format. You can use any image editing software such as Adobe Photoshop or GIMP to convert the image to black and white.
For Adobe Illustrator
If you need a standard grayscale image and want a quick and easy way to do it, follow these steps:
Step 1: Select the images to convert. If you want to convert the entire artwork, use the keyboard shortcut Command + A to select all.
Step 2: Open the Edit menu and click Edit Colors. Then select "Convert to Grayscale" to convert the image to black and white.
Step Three: Done!
For Photoshop
Step 1: Open the image
To open an image, you can go to the "File" menu and select "Open" or use the keyboard shortcut "CTRL+O". When the dialog box appears, navigate to where the image is located, select it, and click Open.
Step 2: Duplicate the layer
Right-click on the original background layer and choose Duplicate Layer. A dialog will appear where you can rename the layer. After that, click OK to create a new layer above the original layer.
Step 3: Convert the image to black and white
There are various ways to convert an image to black and white:
Black and white tool: Go to "Image" > "Adjustment" > "Black and White", click "OK" in the pop-up box.
Hue/Saturation Tool: Go to Image > Adjustments > Hue/Saturation and set Saturation to (-100) or slide the slider all the way to the left. Then, click OK.
Gradient Map Tool: Press 'D' to reset the colors to white and black, then go to Image > Adjustments > Gradient Map and click OK.
Desaturation Tool: Go to Image > Adjustments > Desaturation.
Hue/Saturation adjustment layer: Go to Layer > New Adjustment Layer > Hue/Saturation and click OK. Set Saturation to (-100) or slide the slider all the way to the left. Then, press "CTRL+SHIFT+ALT+E" to create a separate merged layer.
Gradient Map adjustment layer: Press "D" to reset the colors to white and black, then go to Layer > New Adjustment Layer > Gradient Map and click OK. Then, press "CTRL+SHIFT+ALT+E" to create a separate merged layer.
Black and white adjustment layer: Go to Layer > New Adjustment Layer > Black and White, and click OK. Then, press "CTRL+SHIFT+ALT+E" to create a separate merged layer.
Grayscale mode: Go to Image > Mode > Grayscale and click Discard. Note that this method is irreversible and should be used with caution.
Step 4: Invert black and white
To invert a black and white image, go to Image > Adjustments > Invert or use the shortcut key "CTRL+I". The colors of the image will be inverted.
Step 5: Save the Image
To save an image, go to the "File" menu and select "Save As". Rename the image and choose "JPEG" or "PNG" from the "Save as type" option. Click Save to save the image.
For GIMP
Enable grayscale mode:
To convert an image to black and white using grayscale, follow these steps:
Open the image in RGB mode.
Click the "Image" tab in the menu bar, then select "Mode" and click the "Grayscale" radio button.
The image will be instantly converted to black and white.
Once you choose grayscale, all your future input and editing will also be in grayscale. To change this, open Image > Mode and choose RGB to reintroduce color without changing the image that has been converted to grayscale.
Use desaturation:
To convert an image to black and white using desaturation, follow these steps:
To convert an image to black and white using desaturation, follow these steps:
Select the layer you want to turn black and white.
Click the Color option in the menu bar, then choose Saturation.
A popup will appear where you can change the intensity of the black and white shadows using the Scale option.
The tool saves the saturation level as a preset, which means it will use the same settings for other images later.
Besides that, there are other desaturation modes like Luminosity, Brightness, Brightness, Average and Value. Each mode applies a different black and white tone to the image, which can be further adjusted by changing the brightness and color channels.
You can access these modes by opening Color > Desaturation, then selecting Desaturation again.
This will open a popup where you can apply these modes to the image.
Adjust via the channel mixer:
To change the color to black and white using the channel mixer, follow these steps:
Open Color > Components > Monochrome Mixer.
This will turn the image black and white and open a popup to customize the RGB channels.
Now you can use these RGB channels to change the tone of a black and white image.
To maintain the same brightness level, these values should add up to 100%. For example, if you set Red to 31%, Green to 58%, and Blue to 11%, you will get the same black and white tone image as in the Grayscale option.
To prevent brightness issues, enable the "Preserve Brightness" switch. It will adjust RGB layers without affecting brightness levels.
If you're looking for a darker image, lower the blue channel level, which will make certain things stand out.
The advantage of the channel mixer is the flexibility it offers. It allows customization of every part of the image, including red, green and blue levels, for perfect black and white tones. It is especially useful for increasing contrast and highlighting the layout and lines of an image without adding noise.
Step Three: Adjust Contrast and Brightness
After converting the image to black and white, the next step is to adjust the contrast and brightness. You will want to ensure that the light and dark areas of the image have a good balance, as this will help the laser engraver produce more accurate and detailed engravings. You can adjust contrast and brightness using image editing software.
Step 4: Resize the image
After adjusting the contrast and brightness, the next step is to resize the image. You need to make sure the image is suitable for the item you are engraving. You can use image editing software to resize the image to the correct size. Tip: You can also adjust this in LightBurn or whatever software you're using, but it's best to image the edit at your desired output size.
Step 5: Save the image in the correct format
The final step in working with laser engraved images is saving them in the correct format. Laser engravers typically use vector images, such as SVG or AI files. You can use image editing software to save the image in the correct format.
By following the steps below, you can process your laser engraved images and get the best results. Remember to select the correct image, convert it to black and white, adjust contrast and brightness, resize the image, and save it in the correct format. With these tips, you can create personalized and customized items that are unique and beautiful.
Older Post
 Newer Post
The LaserPecker LX1 Specifications

Master the Art of Diode Laser Engraving with These Techniques


